LED Switch Web Server
The ESP32 hosts a web page with ON/OFF buttons that control two LEDs from your phone or laptop.
⬇ Download the sketch
Save
Project_5_ESP32_LED_Switch_Web_Server.ino, then open it in the Arduino IDE (setup: Project 0b). Remember to set your Wi‑Fi credentials.
1 · How an ESP32 web server works
- The ESP32 joins your Wi‑Fi and gets an IP address.
- It listens on port 80 for browsers (clients).
- Visiting
http://<ESP_IP>/returns an HTML page. - Each button links to a special URL (e.g. "ON" →
/26/on). The ESP32 sees the path, switches the LED, and re‑sends the page.
That request‑then‑respond loop is the heart of every web‑server project in this kit.
2 · Set your Wi‑Fi credentials first
Edit these two lines in the sketch with your network name and password:
const char* ssid     = "REPLACE_WITH_YOUR_SSID";
const char* password = "REPLACE_WITH_YOUR_PASSWORD";
The ESP32's Wi‑Fi is 2.4 GHz only — join a 2.4 GHz network, not 5 GHz.
3 · Parts
| Qty | Part | Notes |
|---|---|---|
| 1 | ESP32 · breadboard · jumper wires | — |
| 2 | LED | Have polarity |
| 2 | 220 Ω resistor | One per LED |
4 · Wiring
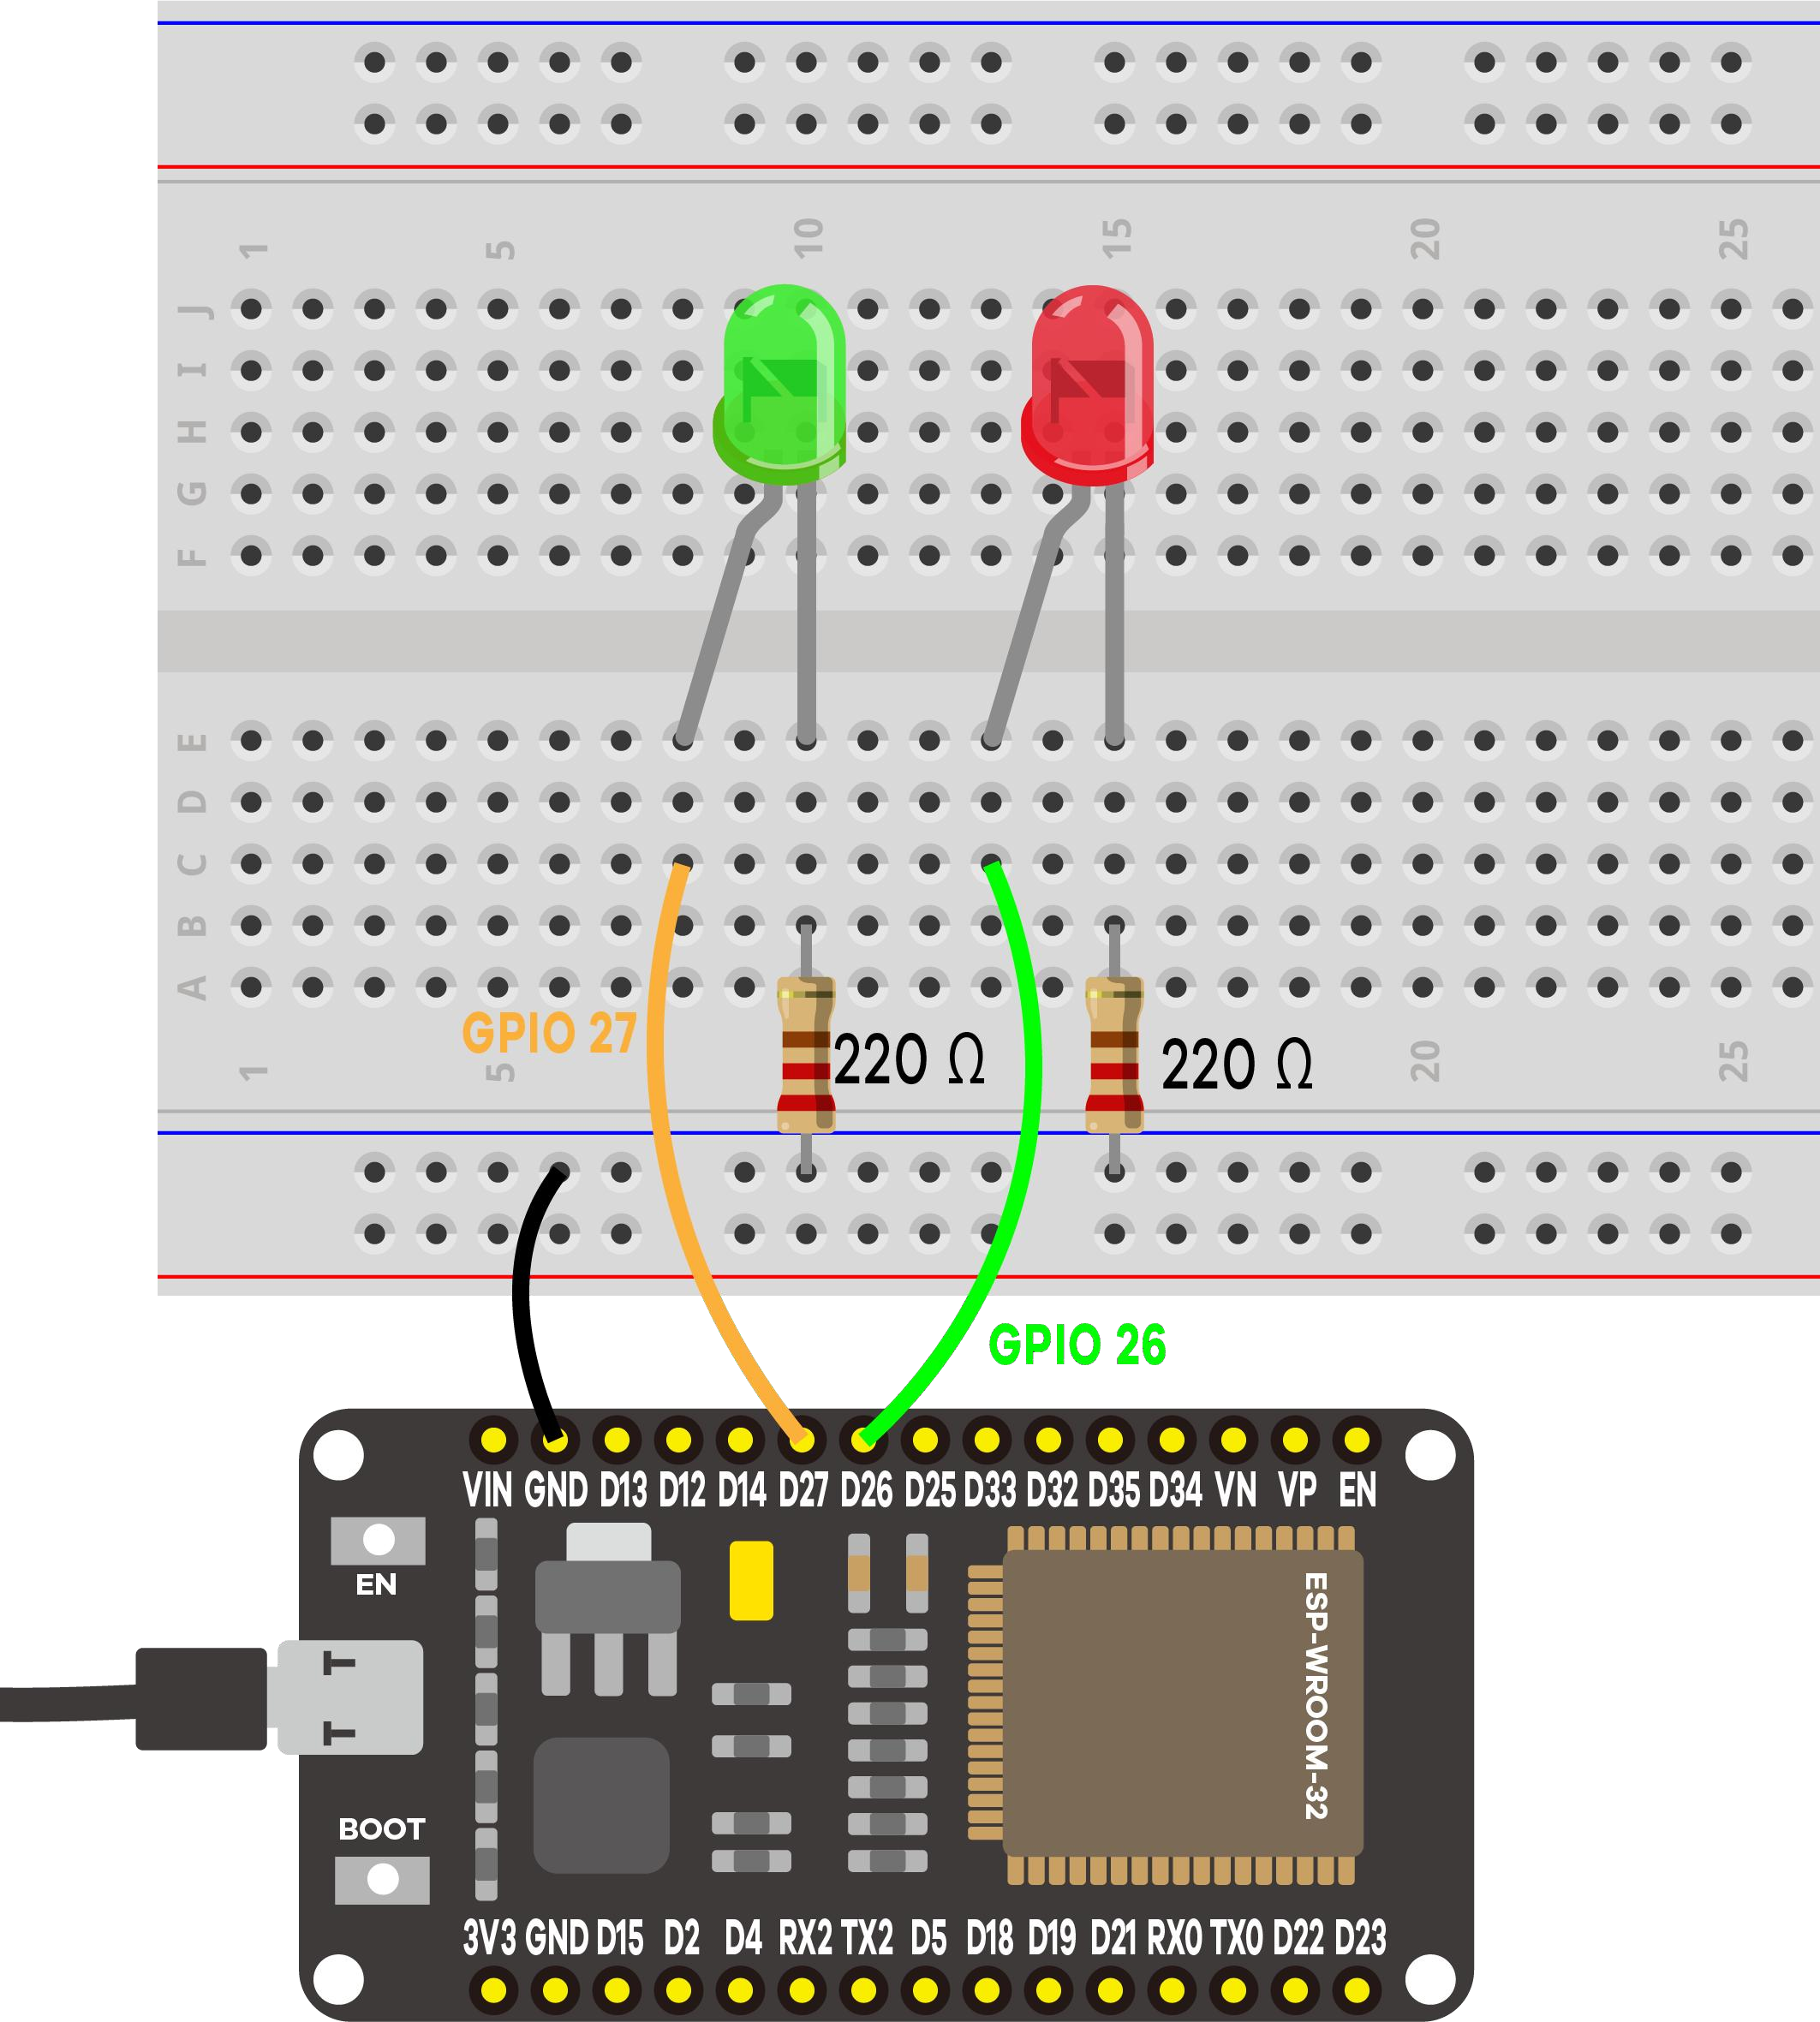
For each LED: GPIO → 220 Ω → LED anode (long leg); cathode (short leg) → GND.
5 · Find the IP & open the page
After uploading, open Serial Monitor at 115200 and press EN/RESET:
==============================================
 Project 5: ESP32 LED Switch Web Server
==============================================
LED 1 -> GPIO 26
LED 2 -> GPIO 27
Connecting to Wi-Fi: MyNetwork
....
Wi-Fi connected!
Open this address in your browser:  http://192.168.1.42
----------------------------------------------
Open that address in a browser on the same network:
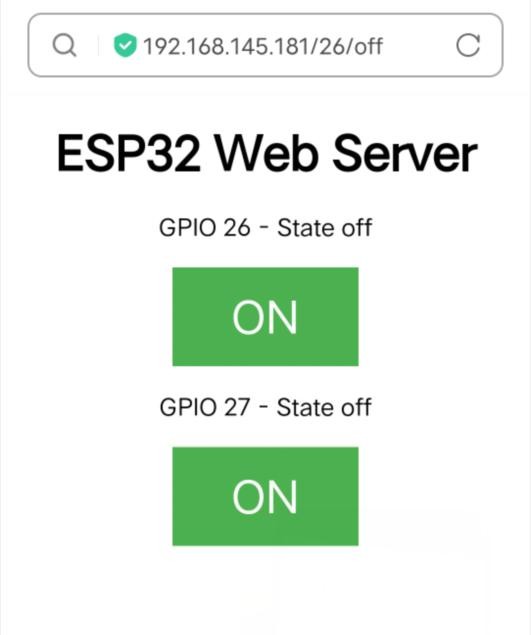
[WEB] New client connected
[WEB] LED 1 (GPIO 26) -> ON
[WEB] Client disconnected
Improved logging: the original dumped the entire raw HTTP request (noisy). This version prints a clear one‑line action per button and a clickable
http:// address. The raw dump is still there, commented out, for debugging.6 · Demonstration
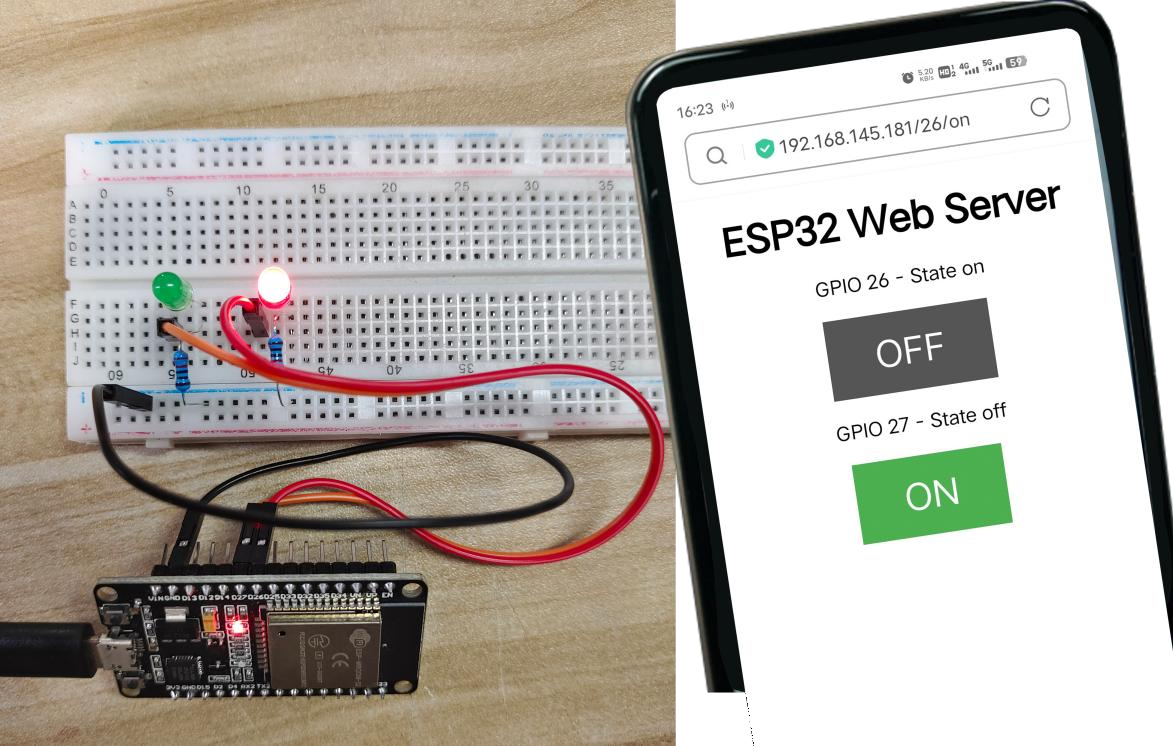
7 · Troubleshooting
| Symptom | Likely cause | Fix |
|---|---|---|
| Stuck on "Connecting…" dots | Wrong credentials / 5 GHz network | Fix SSID+password; use 2.4 GHz |
| Page won't load | Phone on a different network | Same LAN for phone + ESP32 |
| LED reversed | Polarity | Long leg toward the 220 Ω side |
| Monitor blank | Wrong baud | Set it to 115200 |