Setting up the Arduino IDE for ESP32
A picture‑by‑picture install guide. Do it once, then every project just needs Upload.
Brand new? See Project 0 — Introduction & Setup first.
1Install the Arduino IDE
Download and install the Arduino IDE from arduino.cc/en/software. Either the classic 1.8.x or the newer 2.x works.
2Add the ESP32 "Boards Manager URL"
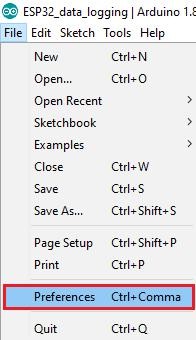
Open File → Preferences:
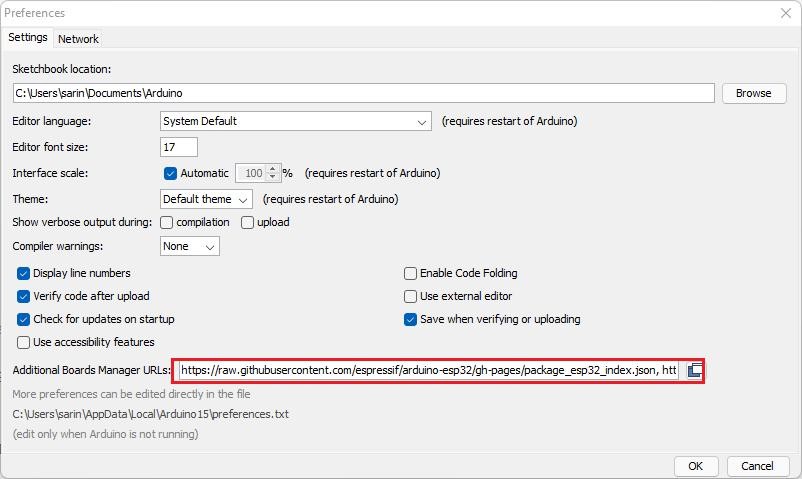
In Additional Boards Manager URLs, paste this and click OK:
https://raw.githubusercontent.com/espressif/arduino-esp32/gh-pages/package_esp32_index.json
3Install the ESP32 package
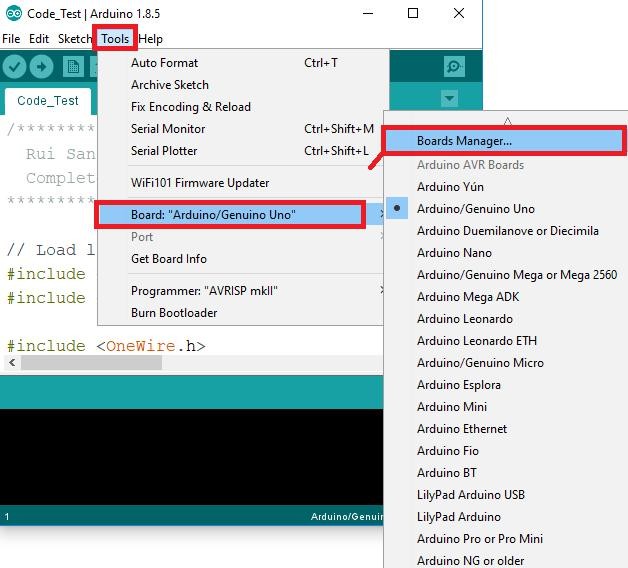
Open Tools → Board → Boards Manager…:
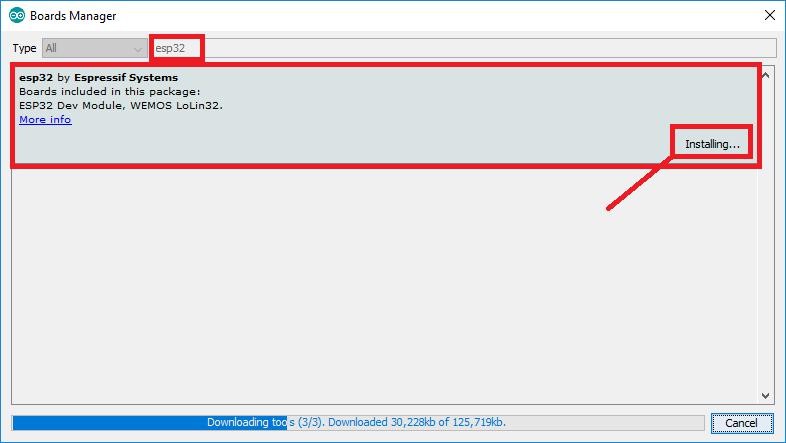
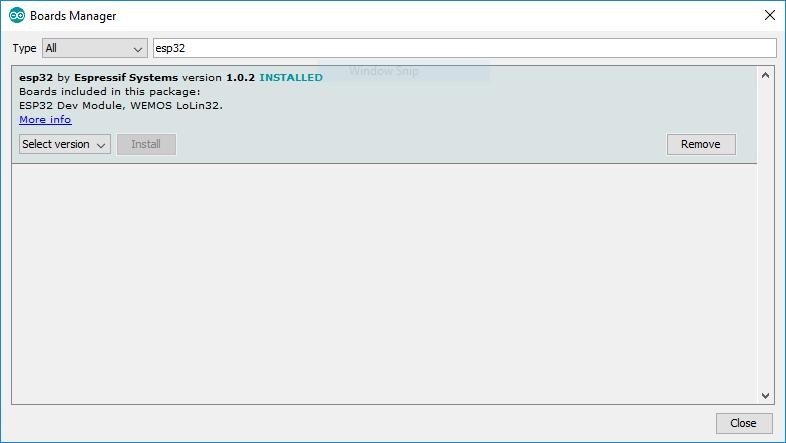
Search esp32, find "esp32 by Espressif Systems", click Install:
4Select the board and port
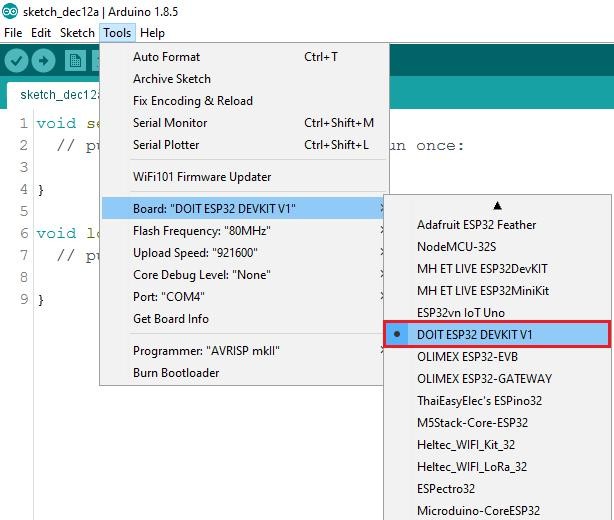
Plug the ESP32 in with a data USB cable, then:
Tools → Board → choose "DOIT ESP32 DEVKIT V1":
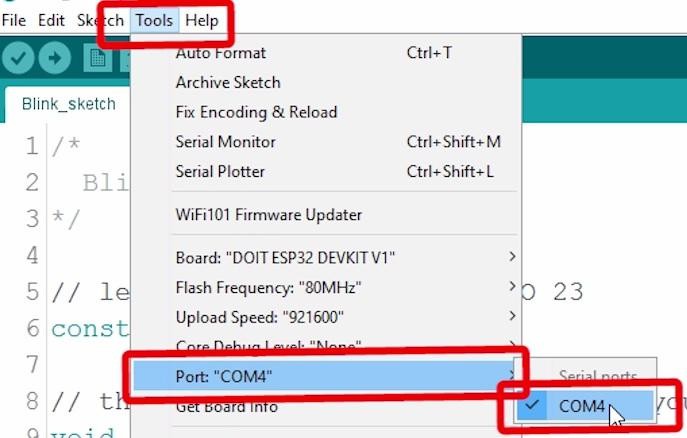
Tools → Port → choose the port (e.g. COM4 on Windows, /dev/ttyUSB0 on Linux):
Install CP2101 drivers Windows has it. Some boards use a CH340 chip instead.5Test with the WiFiScan example
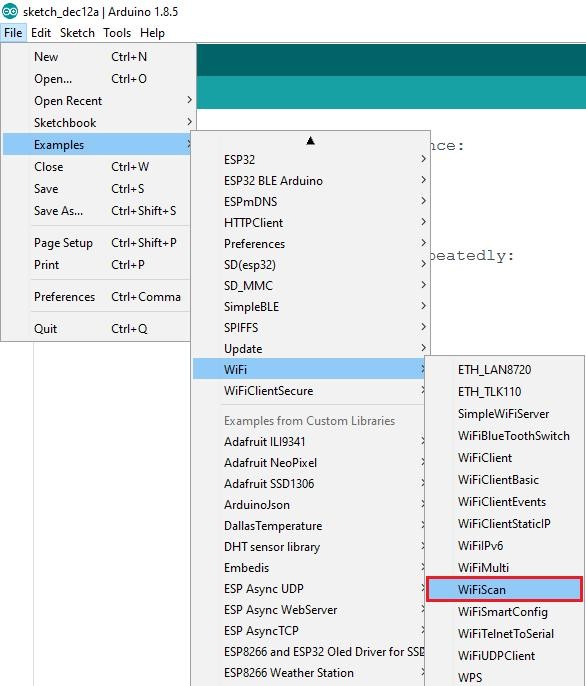
Open File → Examples → WiFi (ESP32) → WiFiScan:
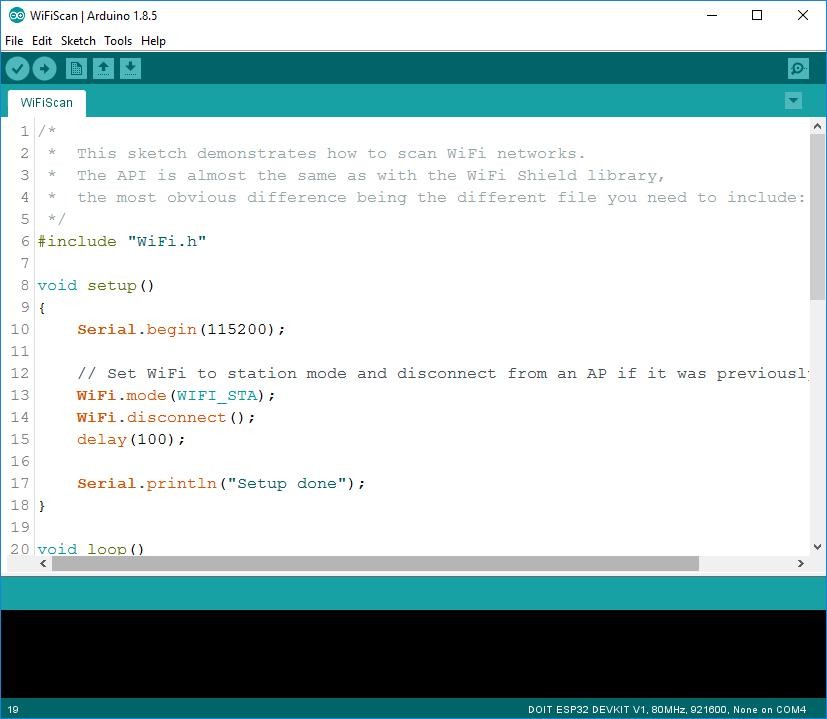
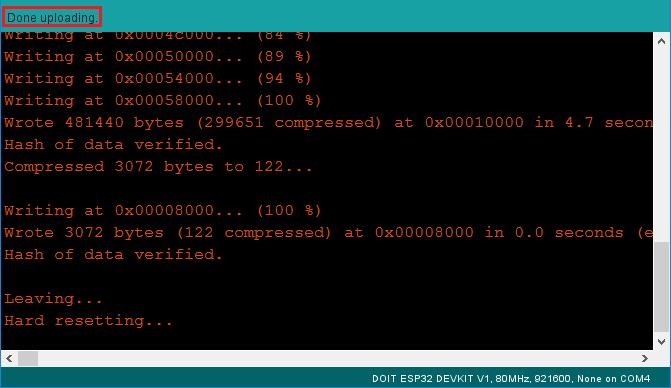
Click Upload (→) and wait for "Done uploading.":
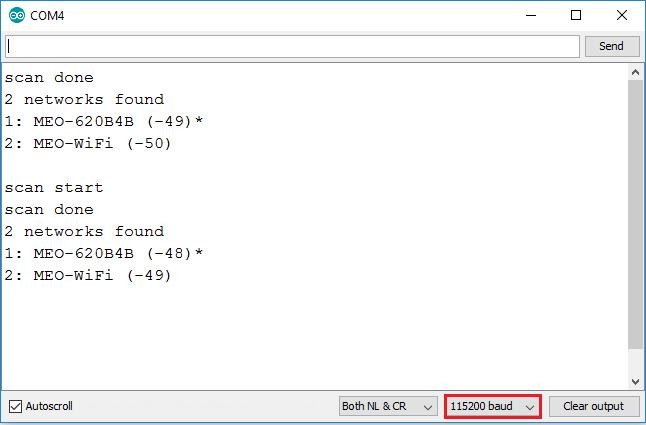
Open Serial Monitor at 115200, press EN/RESET, and watch nearby Wi‑Fi networks appear:
6If an upload won't connect
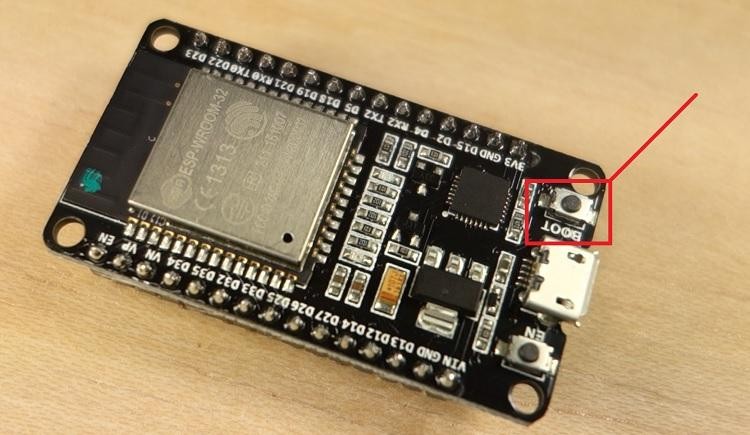
Sometimes uploading stalls with "Failed to connect to ESP32: … Connecting…":
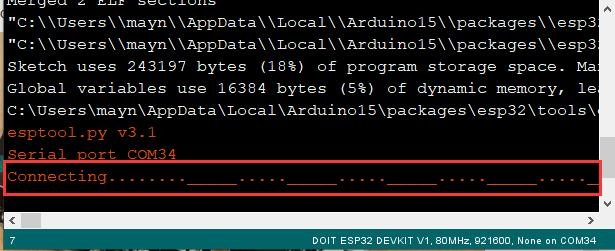
- Press and hold BOOT.
- Click Upload.
- When "Connecting…" appears, release BOOT.
- After "Done uploading", press EN/RESET to run the sketch.
Reminders for every project
- Baud rate is always 115200 — set the Serial Monitor to match.
- Some projects need libraries (DHT, Adafruit GFX/SSD1306, ESPAsyncWebServer, AsyncTCP). Each such project lists exactly what to install.
- Wi‑Fi projects need your network name & password typed into the sketch before uploading.